The Honeywell TH8321WF1001 is a WiFi-enabled touchscreen thermostat designed for smart home integration․ It offers 7-day scheduling, energy-saving features, and compatibility with various HVAC systems, ensuring optimal comfort and efficiency․
1․1 Overview of the Thermostat Features
The Honeywell TH8321WF1001 features a touchscreen interface, Wi-Fi connectivity, and smart home integration․ It supports 7-day scheduling, up to 3 heat and 2 cool stages for heat pumps, and is compatible with dual-powered systems․ The thermostat is RoHS compliant, ensuring environmental safety, and is designed for efficient energy management and seamless system control․
1․2 Importance of Proper Installation
Proper installation ensures safe operation, prevents electrical hazards, and guarantees optimal performance․ Incorrect wiring or setup can lead to system malfunctions or damage․ Following the manual’s guidelines is crucial for compatibility with your HVAC system and to maintain energy efficiency and smart home connectivity features․
System Requirements and Compatibility
The Honeywell TH8321WF1001 is compatible with most HVAC systems, including heat pumps and dual-powered setups, requiring standard electrical connections and supporting Wi-Fi for smart home integration․
2․1 Compatible HVAC Systems
The Honeywell TH8321WF1001 works with various HVAC systems, including forced air, heat pumps, and dual-fuel setups․ It supports up to 3 heating stages and 2 cooling stages, making it versatile for different home configurations․ Compatibility ensures seamless integration with existing heating and cooling systems, providing efficient temperature control and energy savings․
2․2 Electrical Requirements
The Honeywell TH8321WF1001 requires a 24V AC power supply, typically derived from the HVAC system․ It may also be compatible with dual-powered systems, ensuring reliable operation․ Proper wiring and voltage checks are essential to avoid electrical hazards and ensure safe installation and functionality․
2․3 Wi-Fi Connectivity Prerequisites
A stable 2․4 GHz Wi-Fi network is required for the Honeywell TH8321WF1001․ Ensure the thermostat is connected to the same network as your smartphone or tablet․ Download the Honeywell Home app for initial setup and configuration․ A strong internet connection is essential for remote access and smart home integration․ Contact Honeywell support at 1-855-733-5465 for assistance․
Installation Steps
Ensure power is off at the HVAC system․ Remove the old thermostat and mount the new device․ Connect wires carefully and follow on-screen setup instructions․
3․1 Preparing the Site
Turn off power to the HVAC system at the circuit breaker․ Ensure the furnace door is closed securely․ Assess the installation location, ensuring it’s 5 ft above the floor․ Clear furniture or obstructions nearby․ Clean the area around the old thermostat․ Gather tools like a drill, screwdrivers, and a level․ Review the manual to understand the process before starting․
3․2 Removing the Old Thermostat
Turn off power to the HVAC system at the breaker․ Remove batteries from the old thermostat, if applicable․ Gently pull the thermostat away from the wall to access wires․ Label each wire with its terminal label using tags or colors․ Carefully disconnect wires to avoid tangles․ Set the old thermostat aside for proper disposal․ Inspect for any additional components that may need removal․
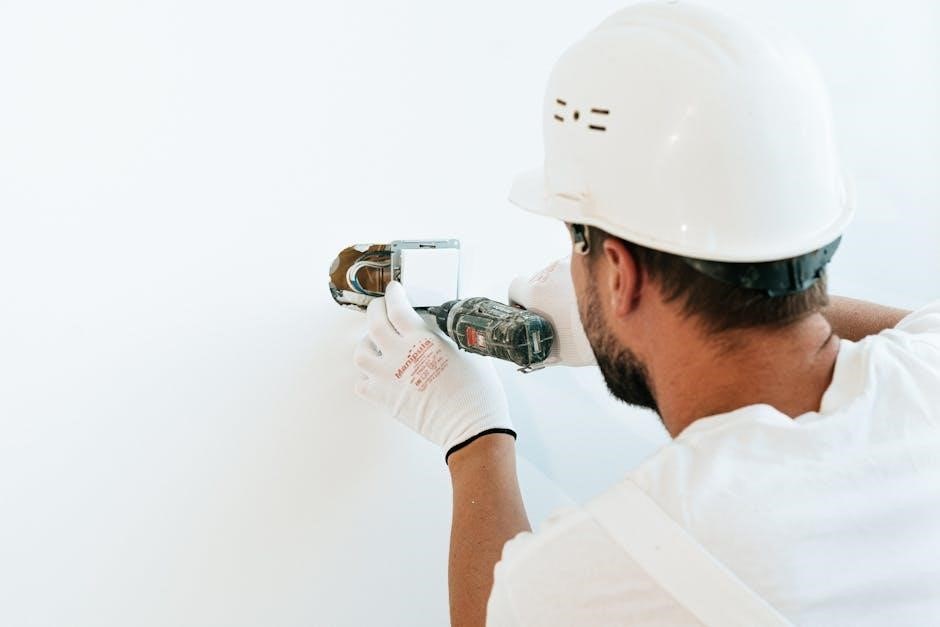
3․3 Mounting the New Thermostat
Attach the wallplate to the wall using screws or adhesive strips․ Ensure it is level for proper installation․ Snap the thermostat onto the wallplate, aligning it securely․ Check for proper fit and alignment․ Tighten any retaining clips or screws to hold the thermostat firmly in place․ Verify the display lights up and functions correctly after mounting․ Ensure all electrical connections are secure before proceeding․
Wiring and Terminal Connections
Ensure proper wiring by matching terminal labels from old to new thermostat․ Connect wires securely to corresponding terminals for heating, cooling, and power․ Verify compatibility with HVAC systems and configure dual-powered setups if required․ Double-check connections for safety and functionality before powering up the system․
4;1 Understanding Terminal Labels
Terminal labels (e․g․, R, W, Y, G, C, etc․) indicate specific wiring connections․ Match these labels from your old thermostat to the new one to ensure correct wiring․ Verify the function of each terminal (e․g․, power, heating, cooling, fan) before connecting wires․ Proper labeling ensures safe and accurate installation․ Always disconnect power before starting work․
4․2 Connecting Wires to the Thermostat
Disconnect power before connecting wires to avoid electrical shock․ Match each wire from your HVAC system to the corresponding terminal on the thermostat․ Securely insert wires into terminals, ensuring they are tightly connected․ Double-check wiring to prevent loose connections․ Once all wires are connected, restore power and test the system to ensure proper operation․
4․3 Dual-Powered System Configuration
For dual-powered systems, ensure proper terminal connections and configure the thermostat’s settings․ Verify that the A-L/A terminal is wired correctly for economizer functionality․ Set the system changeover to either manual or automatic based on your HVAC setup․ Test the configuration to ensure smooth transitions between heating and cooling modes, and confirm that all electrical connections are secure to avoid potential hazards․

Configuring Installer Settings
Configure installer settings to optimize system performance․ Set options like system changeover (manual or auto) and test the installation to ensure proper functionality and compatibility with your HVAC setup․
5․1 Setting Up Installer Options
Access the Installer Setup menu to configure system settings․ Adjust options like changeover mode (manual or auto) and equipment status․ Ensure all settings align with your HVAC system’s specifications for optimal performance․ Refer to the manual for detailed instructions on each option to avoid configuration errors and ensure proper thermostat operation․
5․2 System Changeover (Manual/Auto)
Select between Manual or Auto changeover modes․ Manual mode requires user input to switch between heating and cooling, while Auto mode automatically adjusts based on temperature setpoints․ Choose the mode that best suits your climate and preferences for seamless system operation․ Ensure the setting matches your HVAC system’s capabilities for optimal performance and energy efficiency․
5․3 Testing the Installation
After installation, test the thermostat by checking basic operation, including heating and cooling cycles․ Verify power is restored and the furnace or HVAC system operates correctly․ Ensure the touchscreen is responsive and all connections are secure․ Confirm Wi-Fi connectivity and test scheduled settings to ensure proper functionality․ Address any issues promptly for optimal performance․
Connecting to the Wi-Fi Network
Link the thermostat to your Wi-Fi network for remote access and smart home integration․ Ensure a stable connection for optimal performance and seamless functionality․
6․1 Linking the Thermostat to Wi-Fi
Connect the thermostat to your Wi-Fi network by selecting your network from the available list․ Enter the password using the touchscreen interface․ Ensure the thermostat is in pairing mode for a successful connection․ Once connected, the thermostat will confirm the link, enabling remote control via the Honeywell Home app․
6․2 Integrating with Smart Home Systems
The Honeywell TH8321WF1001 seamlessly integrates with popular smart home systems like Amazon Alexa and Google Home․ Enable voice control for effortless temperature adjustments․ Use the Honeywell Home app to monitor and manage settings remotely, ensuring enhanced convenience and energy efficiency across your connected home devices․
Setting Up Schedules and Preferences
Configure custom heating and cooling schedules to align with your daily routine․ Adjust temperature setpoints, fan settings, and energy-saving preferences to optimize comfort and energy efficiency year-round․
7․1 Creating a Heating and Cooling Schedule
Set up a 7-day schedule with up to 6 periods daily․ Program different temperatures for heating and cooling modes to match your lifestyle․ Use the touchscreen to customize start/end times, ensuring comfort and energy efficiency․ Save preferences to maintain consistent settings throughout the week, optimizing your home’s climate control automatically․
7․2 Adjusting Temperature Setpoints
Use the touchscreen to adjust heating and cooling setpoints․ Set desired temperatures for comfort and energy efficiency․ Adjustments can be made manually or through the schedule․ The thermostat maintains consistent temperatures, optimizing performance․ Ensure settings align with your daily routine for maximum comfort and energy savings․
Maintenance and Troubleshooting
Regularly clean the thermostat and check batteries․ Inspect wiring and ensure proper connections․ Troubleshoot common issues like display problems or connectivity loss․ Refer to the manual for solutions or contact Honeywell support for assistance․
8․1 Routine Maintenance Tips
Regularly clean the thermostat’s touchscreen to ensure responsiveness․ Check and replace batteries as needed to avoid power issues․ Inspect wiring connections for loose terminals or damage․ Schedule annual HVAC system maintenance to optimize performance․ Update software periodically for improved functionality and security․ Refer to the manual for detailed maintenance guidelines․
8․2 Common Issues and Solutions
Issue: Thermostat not turning on․
Solution: Check power sources and ensure wiring is secure․
Issue: Incorrect temperature readings․
Solution: Calibrate the thermostat or clean the sensor․
Issue: Wi-Fi connectivity problems․
Solution: Restart the router and ensure proper network settings․
Issue: System not responding․
Solution: Verify HVAC system compatibility and wiring connections․ Refer to the manual for troubleshooting guides․

Honeywell Support and Resources
Honeywell provides comprehensive support, including user manuals, installation guides, and customer service․ Contact support at 1-855-733-5465 or visit their website for additional resources and assistance․
9․1 Accessing the User Manual
The user manual for the Honeywell TH8321WF1001 is available as a PDF download․ It provides detailed installation, operation, and troubleshooting instructions․ Visit Honeywell’s official website or refer to the product’s support page to access the manual and ensure proper setup and usage of the thermostat․
9․2 Contacting Customer Support
For assistance with the Honeywell TH8321WF1001, contact customer support at 1-855-733-5465․ Visit Honeywell’s official website for additional resources, or consult the user manual for troubleshooting guides․ Authorized professionals are also available to help with installation and maintenance, ensuring your thermostat operates efficiently and effectively year-round․
Proper installation and configuration ensure the Honeywell TH8321WF1001 operates at peak efficiency, delivering energy savings and optimal comfort for your home․
10․1 Final Checks for Proper Operation
After installation, ensure the thermostat powers on, the display is responsive, and all system functions operate as expected․ Verify Wi-Fi connectivity, schedule settings, and temperature adjustments․ Test heating and cooling modes to confirm proper operation․ Check for any error messages and resolve them promptly to ensure seamless performance․
- Ensure the thermostat powers on and the display is responsive․
- Verify Wi-Fi connectivity and successful network linking․
- Check that heating and cooling systems activate as scheduled․
- Confirm temperature adjustments are accurate and responsive․
- Review error messages and resolve any issues promptly․
10․2 Ensuring Optimal Performance
For optimal performance, regularly clean the thermostat and ensure proper wiring connections․ Update the software to the latest version for enhanced features and compatibility․ Check system settings to ensure they align with your HVAC configuration․ Review and adjust schedules and preferences to maximize energy efficiency and comfort․ Proper maintenance ensures long-term reliability and functionality․