Discover how to efficiently maintain your General Electric stove with self-cleaning instructions, ensuring a safe and eco-friendly cooking experience through innovative technology and proper maintenance techniques.
1.1 Overview of Self-Cleaning Technology
GE stoves feature advanced self-cleaning technology that simplifies oven maintenance. This innovative system uses high heat to burn food residue, turning it into ash for easy removal. The process is eco-friendly and reduces the need for harsh chemicals. Users can activate the self-cleaning cycle, which locks the oven door for safety during the cleaning phase. Proper preparation, such as removing racks and ensuring ventilation, is essential for optimal results. This technology promotes efficiency and convenience for homeowners seeking a low-maintenance cooking experience.
1.2 Importance of Regular Oven Maintenance
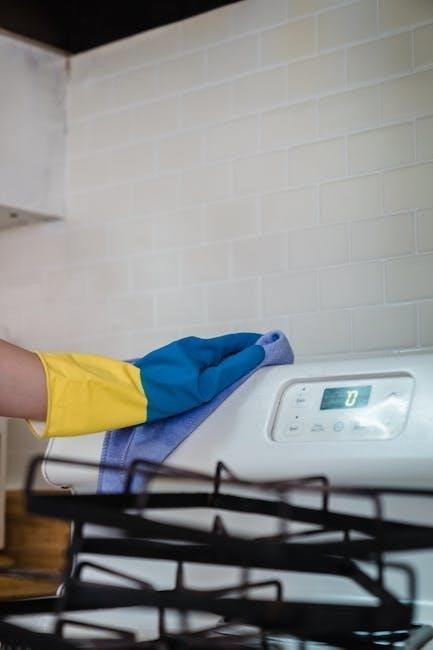
Regular oven maintenance is crucial for ensuring optimal performance and longevity of your General Electric stove. Food residue and spills, if left unchecked, can harden and become difficult to remove, potentially damaging the oven’s interior. Cleaning after each use prevents grime buildup and ensures the self-cleaning function works effectively. Proper maintenance also enhances safety by reducing fire hazards and maintains energy efficiency. Consistent upkeep prolongs the appliance’s lifespan and keeps your cooking environment hygienic and functional.

Understanding the Self-Cleaning Function
The self-cleaning function uses high heat or steam to break down food residue, making cleanup easier. Regular use ensures efficiency and maintains your stove’s performance safely.
2.1 How the Self-Cleaning Cycle Works
The self-cleaning cycle operates by heating the oven to an extremely high temperature, typically around 250°C, to burn food residue into ash. This process is energy-intensive but effective, as it reduces tough stains and grime. The cycle duration varies, usually taking 2-4 hours, depending on the oven’s model and soil level. After completion, the oven cools, and the ash can be easily wiped away. Proper ventilation is essential during this process to prevent fumes from accumulating in the kitchen. Always allow the oven to cool completely before cleaning for safety and efficiency.
2.2 Benefits of Using the Self-Cleaning Feature
Using the self-cleaning feature offers numerous benefits, including efficient removal of tough food residue, reduced need for harsh chemicals, and a safer cleaning process. The high heat breaks down grime into ash, making post-cleaning wipes effortless. It also extends the oven’s lifespan by maintaining its interior condition. Additionally, this feature is eco-friendly, as it reduces the reliance on chemical cleaners. Regular use of the self-cleaning cycle ensures a hygienic cooking environment and enhances overall oven performance over time.
Preparing Your Kitchen for Self-Cleaning
Open windows and doors for ventilation, remove oven racks, and cover nearby surfaces. Turn on kitchen lights to monitor the process and ensure safety during cleaning.
3.1 Steps to Prepare Your Kitchen
Turn off the oven and ensure it cools completely. Open all windows and doors for proper ventilation. Remove oven racks and cover nearby surfaces to protect from residue. Clear the kitchen of flammable items and ensure good lighting for visibility. Place a drip pan or old towels under the oven door to catch debris. Keep the kitchen well-ventilated to avoid fumes and ensure a safe cleaning process. Avoid using harsh chemicals and let the oven cool before cleaning.
3.2 Ensuring Proper Ventilation
Open all windows and doors to maximize airflow. Turn on exhaust fans to remove fumes. Ensure the kitchen is well-ventilated to prevent vapor buildup. Avoid inhaling harsh fumes by maintaining a safe distance. Keep the area clear of flammable materials. Proper ventilation ensures a safer and more efficient self-cleaning process, reducing the risk of harmful fumes and ensuring a clean, odor-free kitchen environment.
Activating the Self-Cleaning Cycle
Turn the oven knobs to the Clean position and set the temperature to 250°C for 1 hour. Pour water for steam cleaning and start the cycle.
4.1 Setting the Oven for Self-Cleaning Mode
To activate self-cleaning mode, turn the oven knobs to the “Clean” position and set the temperature to 250°C. Pour one cup of water into the oven bottom for steam cleaning. Close the oven door tightly, ensuring it is sealed properly. Avoid using harsh chemicals and keep the stove burners turned off during this process. Proper ventilation is essential to prevent fumes from building up in your kitchen.
4.2 Monitoring the Cleaning Process
Once the self-cleaning cycle starts, monitor the process by observing the oven light to ensure it’s functioning properly. Keep the oven door closed throughout the cycle to maintain high temperatures. Open windows and ensure proper ventilation to prevent fumes from accumulating. Avoid distractions and stay nearby to address any issues. Do not open the door until the cycle is complete and the oven has cooled slightly. This ensures a safe and effective cleaning process.

Safety Precautions During Self-Cleaning
Always turn off the oven before cleaning and ensure proper ventilation by opening windows. Avoid using steam cleaners and keep children away during the self-cleaning process.
5.1 Essential Safety Measures
Ensure the oven is turned off and cool before cleaning. Open windows and doors for proper ventilation. Avoid using steam cleaners or commercial oven cleaners. Keep children and pets away during the self-cleaning cycle. Do not touch the oven surfaces until they have cooled completely. If you smell gas, do not use electrical switches or phones; evacuate the area immediately. Always follow the manufacturer’s guidelines to prevent accidents and maintain safety.
5.2 Avoiding Common Mistakes
Avoid using commercial oven cleaners or steam cleaners, as they can damage the oven’s surfaces. Never open the oven door during the self-cleaning cycle, as extreme heat can cause burns. Do not forget to remove oven racks before starting the cycle. Ensure the oven is completely cool before cleaning to prevent accidents. Avoid using abrasive materials that may scratch the interior. Always follow the recommended temperature settings and timing to prevent malfunction. Proper preparation prevents damage and ensures effective cleaning.
Post-Cleaning Maintenance Tips
After self-cleaning, wipe down the oven interior with a damp cloth to remove ash. Clean racks with soap and water, and ensure all surfaces are dry before reuse.
6.1 Cleaning the Oven Door and Racks
Remove racks and soak them in soapy water to eliminate tough residue. For the oven door, wipe down with a damp cloth, paying attention to hinges and handles. Avoid harsh chemicals, as they can damage finishes. For stubborn stains, mix baking soda and water to create a paste, apply it, and let it sit before scrubbing. Rinse thoroughly and dry racks before reinstalling to prevent water spots. Ensure the door is securely closed after cleaning for proper oven function.
6.2 Wipe Down the Oven Interior
After the self-cleaning cycle, allow the oven to cool completely before wiping down the interior. Use a soft, damp sponge or microfiber cloth to remove any remaining ash or residue. For tougher spots, activate the steam cleaning function by pouring water into the oven bottom and running a short steam cycle. Avoid using abrasive cleaners or bleach, as they can damage the finish. Gently rinse and dry the interior with a clean cloth to prevent streaks and maintain a polished appearance.
Troubleshooting Common Issues
Address common issues like malfunctioning self-clean modes by turning off the oven and disconnecting power. Contact a qualified technician for servicing to ensure proper function.
7.1 Malfunctioning Self-Cleaning Mode
If your GE stove’s self-cleaning mode isn’t working, ensure the oven is turned off and disconnected from power. Check for any blockages or incorrect settings. Avoid using steam cleaners on the interior, as they can damage surfaces. For exterior maintenance, avoid harsh chemicals and abrasive cleaners. If issues persist, contact a qualified technician for professional servicing. Regularly cleaning racks and wiping down surfaces can prevent future malfunctions. Always follow manufacturer guidelines to maintain your stove’s performance and safety.
7.2 Dealing with Residue After Cleaning
To address residue after self-cleaning, pour one cup of water into the oven and use the steam function for 30 minutes. This gentle method loosens remaining grime without harsh chemicals. Avoid using abrasive cleaners or scrubbers, as they can damage surfaces. After the cycle, let the oven cool, then wipe down the interior with a damp cloth. For tough spots, repeat the steam process or manually clean with a soft sponge. Regular maintenance prevents heavy buildup and ensures optimal performance.
Eco-Friendly Cleaning Practices
Prioritize eco-friendly methods by using steam cleaning, which eliminates tough residue without harsh chemicals, aligning with environmental care and energy efficiency for your GE stove maintenance.
8.1 Using Steam for a Greener Clean
Steam cleaning offers an eco-friendly alternative for your GE stove. By using water vapor at high temperatures, it effectively breaks down tough residue without harsh chemicals. Simply pour one cup of water into the oven base, close the door, and activate the steam function. The cycle typically runs for 30 minutes, leaving the interior clean and residue-free. This method is energy-efficient and aligns with environmentally responsible cleaning practices, making it a sustainable choice for maintaining your stove.
8.2 Avoiding Harsh Chemicals
Avoid using harsh chemicals or commercial oven cleaners, as they can damage the stove’s finish or release harmful fumes. Instead, opt for gentle cleaning methods like steam or mild detergents. For tougher residue, mix water and baking soda to create a non-toxic paste. Always follow GE’s recommended cleaning products and avoid abrasive scrubbers to maintain your stove’s integrity. Regular wiping after use can prevent heavy buildup, reducing the need for intense cleaning. This approach supports eco-friendly and safer kitchen maintenance practices.
Cost-Effective Cleaning Solutions
Explore budget-friendly methods to maintain your GE stove, such as using steam cleaning and energy-efficient cycles, which reduce chemical use and extend appliance lifespan.
9.1 Saving Energy During Self-Cleaning
Optimize energy use by selecting shorter self-cleaning cycles or lower temperatures when possible. GE stoves offer energy-efficient modes that reduce consumption while still effectively cleaning. Ensure the oven is empty of large food debris before starting, as this minimizes the cycle’s duration. Regular light cleaning can prevent the need for long, energy-intensive deep cleans. Additionally, GE’s advanced insulation helps retain heat, reducing overall energy required for the self-cleaning process.
9.2 Extending the Life of Your Stove
Regular self-cleaning and proper maintenance can significantly extend your stove’s lifespan. Avoid using abrasive cleaners or metal scourers, as they may damage the interior. For tougher residue, steam cleaning is a gentle yet effective option. Always follow GE’s recommended cleaning products and procedures to prevent damage. Additionally, ensuring the oven is cool before cleaning and avoiding harsh chemicals will help maintain its condition and performance over time.

Additional Features of GE Appliances
GE Appliances offer smart integration, allowing remote control via apps, and customizable cleaning options for tailored maintenance. These features enhance convenience and efficiency, ensuring optimal performance.
10.1 Smart Integration for Modern Convenience
GE Appliances feature smart integration, enabling seamless connectivity to your home network. Through dedicated apps, users can remotely monitor and control their stove’s functions, including self-cleaning cycles. This technology allows for scheduling cleanings, receiving notifications, and adjusting settings with ease. Smart integration also supports voice commands through compatible devices, enhancing convenience. The touch-screen interface on select models further simplifies operation, ensuring a modern and user-friendly experience for maintaining your stove efficiently.
10.2 Customizable Cleaning Options
GE stoves offer customizable cleaning options, allowing users to tailor the self-cleaning process to their needs. The steam function is a popular choice, providing a gentle yet effective clean. Users can pour water into the oven, select the steam option, and let the 30-minute cycle work. For tougher messes, higher temperature settings are available. This flexibility ensures efficient cleaning while maintaining energy efficiency. Customizable options make it easy to keep your stove in prime condition with minimal effort.